

開発環境
開発環境は下記の通り。
| 開発環境 | 名称 | 説明 |
| 開発言語 | Java | 人気の開発言語 |
| 開発ツール | Eclipse | Javaでの定番開発ツール |
| フレームワーク | Spring Boot | 人気のSpringフレームワークをベースとしたフレームワーク |
| テンプレートエンジン | Thymeleaf | Spring Bootと相性が良いテンプレートエンジン |
| データベース | MySQL | フリーで利用できる人気のデータベース |
開発環境の構築手順はこちらの記事で紹介しています。
スポンサーリンク
ディレクトリ構成
springSample
  |
  |___src.main.java
       |
       |___com.example.demo
       |    |
       |    |___controller
       |    |    |
       |    |    |__UserController.java
       |    |
       |    |___entity
       |    |    |
       |    |    |___User.java
       |    |
       |    |___dto
       |    |    |
       |    |    |___UserSearchRequest.java
       |    |
       |    |___repository
       |    |    |
       |    |    |___UserMapper.java
       |    |
       |    |___service
       |         |
       |         |___UserService.java
       |
       |___src.main.resources
            |
            |___com.example.demo
            |    |
            |    |___repository
            |         |
            |         |___UserMapper.xml
            |
            |___templates
            |    |
            |    |___user
            |         |
            |         |___search.html
            |
            |___static
                 |
                 |___css
                      |
                      |___list.css
事前準備
データベース接続設定
プロジェクトにある「application.properties」(※もしくは application.yml)を開き、MySQLの接続情報を設定します。
spring.datasource.url=jdbc:mysql://localhost/sampledb
spring.datasource.username=root
spring.datasource.password=password
spring.datasource.driver-class-name=com.mysql.cj.jdbc.Driver
mybatis.configuration.map-underscore-to-camel-case=true
build.gradleの依存関係
プロジェクトにある「build.gradle」を開き、使用する機能と依存関係の設定を行います。
今回はmybatisを利用するので「mybatis-spring-boot-starter」を追加します。
[build.gradleの例]
dependencies {
  implementation 'org.springframework.boot:spring-boot-starter-thymeleaf'
  implementation 'org.springframework.boot:spring-boot-starter-web'
  implementation 'org.mybatis.spring.boot:mybatis-spring-boot-starter:2.1.0'
  compileOnly 'org.projectlombok:lombok:1.16.4'
  runtimeOnly 'org.springframework.boot:spring-boot-devtools'
  runtimeOnly 'mysql:mysql-connector-java'
  providedRuntime 'org.springframework.boot:spring-boot-starter-tomcat'
  testImplementation 'org.springframework.boot:spring-boot-starter-test'
}
Gradleではなく、Mavenを使っている場合は、pom.xmlに「mybatis-spring-boot-starter」を追加します。
[pom.xmlの例]
<dependencies>
    <dependency>
        <groupId>org.mybatis.spring.boot</groupId>
        <artifactId>mybatis-spring-boot-starter</artifactId>
        <version>2.1.0</version>
    </dependency>
    <dependency>
        <groupId>org.springframework.boot</groupId>
        <artifactId>spring-boot-starter-thymeleaf</artifactId>
    </dependency>
    <dependency>
        <groupId>org.springframework.boot</groupId>
        <artifactId>spring-boot-starter-web</artifactId>
    </dependency>

    <dependency>
        <groupId>mysql</groupId>
        <artifactId>mysql-connector-java</artifactId>
        <scope>runtime</scope>
    </dependency>
    <dependency>
        <groupId>org.projectlombok</groupId>
        <artifactId>lombok</artifactId>
        <optional>true</optional>
    </dependency>
    <dependency>
        <groupId>org.springframework.boot</groupId>
        <artifactId>spring-boot-starter-tomcat</artifactId>
        <scope>provided</scope>
    </dependency>
    <dependency>
        <groupId>org.springframework.boot</groupId>
        <artifactId>spring-boot-starter-test</artifactId>
        <scope>test</scope>
        <exclusions>
            <exclusion>
                <groupId>org.junit.vintage</groupId>
                <artifactId>junit-vintage-engine</artifactId>
            </exclusion>
        </exclusions>
    </dependency>
</dependencies>
データベースにデータを準備
・Create文
CREATE TABLE `sampledb`.`user` (
  `id` BIGINT NOT NULL AUTO_INCREMENT,
  `name` VARCHAR(100) NOT NULL,
  `address` VARCHAR(255) NULL,
  `phone` VARCHAR(50) NULL,
  `update_date` DATETIME NOT NULL,
  `create_date` DATETIME NOT NULL,
  `delete_date` DATETIME NULL,
  PRIMARY KEY (`id`));
・Insert文
INSERT INTO `sampledb`.`user` (`id`, `name`, `address`, `phone`, `update_date`, `create_date`) VALUES ('1', 'テスト太郎', '東京都サンプル区1-1', '080-0000-0000', '2019-05-06 12:00:00', '2019-05-01 12:00:00');スポンサーリンク
バックエンド(サーバ側)のソースコード
UserController.java:Controllerクラス
入出力の管理を行うControllerクラスは下記の通り。
[com.example.demo.controller.UserController.java]
package com.example.demo.controller;

import org.springframework.beans.factory.annotation.Autowired;
import org.springframework.stereotype.Controller;
import org.springframework.ui.Model;
import org.springframework.web.bind.annotation.GetMapping;
import org.springframework.web.bind.annotation.ModelAttribute;
import org.springframework.web.bind.annotation.RequestMapping;
import org.springframework.web.bind.annotation.RequestMethod;

import com.example.demo.dto.UserSearchRequest;
import com.example.demo.entity.User;
import com.example.demo.service.UserService;

/**
 * ユーザー情報 Controller
 */
@Controller
public class UserController {
  /**
   * ユーザー情報 Service
   */
  @Autowired
  UserService userService;

  /**
   * ユーザー情報検索画面を表示
   * @param model Model
   * @return ユーザー情報一覧画面
   */
  @GetMapping(value = "/user/search")
  public String displaySearch(Model model) {
    model.addAttribute("userSearchRequest", new UserSearchRequest());
    return "user/search";
  }

  /**
   * ユーザー情報検索
   * @param userSearchRequest リクエストデータ
   * @param model Model
   * @return ユーザー情報一覧画面
   */
  @RequestMapping(value = "/user/id_search", method = RequestMethod.POST)
  public String search(@ModelAttribute UserSearchRequest userSearchRequest, Model model) {
    User user = userService.search(userSearchRequest);
    model.addAttribute("userinfo", user);
    return "user/search";
  }
}
画面表示時動作する「displaySearch」メソッドと、検索時に動作する「search」メソッドを用意しています。
UserService.java:Serviceクラス
処理(ビジネスロジック)を記述するServiceクラスは下記の通り。
[com.example.demo.service.UserService.java]
package com.example.demo.service;

import org.springframework.beans.factory.annotation.Autowired;
import org.springframework.stereotype.Service;

import com.example.demo.dto.UserSearchRequest;
import com.example.demo.entity.User;
import com.example.demo.repository.UserMapper;

/**
 * ユーザー情報 Service
 */
@Service
public class UserService {
    /**
     * ユーザー情報 Mapper
     */
    @Autowired
    private UserMapper userMapper;

    /**
     * ユーザー情報検索
   * @param userSearchRequest リクエストデータ
     * @return 検索結果
     */
    public User search(UserSearchRequest userSearchRequest) {
        return userMapper.search(userSearchRequest);
    }
}
UserMapper.java:Repositoryクラス
データベースへアクセスするためのRepositoryクラスは下記の通り。]
[com.example.demo.repository.UserMapper.java]
package com.example.demo.repository;

import org.apache.ibatis.annotations.Mapper;

import com.example.demo.dto.UserSearchRequest;
import com.example.demo.entity.User;

/**
 * ユーザー情報 Mapper
 */
@Mapper
public interface UserMapper {
    /**
     * ユーザー情報検索
     * @param user 検索用リクエストデータ
     * @return ユーザー情報
     */
    User search(UserSearchRequest user);
}
MyBatisでは、Javaクラスの中にSQL文を書くこともできますが、今回はXMLファイルにSQL文を記述するため、ここでは記述していません。
※Javaクラス内にSQL文を記述する場合は、下記のように指定します。この場合はXMLファイル不要。
@Select("SELECT * FROM user WHERE id = #{id}")
User search(UserSearchRequest user);
UserMapper.xml:SQL文(XMLファイル)
MyBatisで実行するSQL文(XMLファイル)は下記の通り。
[resources.com.example.demo.repository.UserMapper.xml]
<?xml version="1.0" encoding="UTF-8" ?>
<!DOCTYPE mapper
        PUBLIC "-//mybatis.org//DTD Mapper 3.0//EN"
        "http://mybatis.org/dtd/mybatis-3-mapper.dtd">
<mapper namespace="com.example.demo.repository.UserMapper">
    <select id="search" resultType="com.example.demo.entity.User">
        SELECT * FROM user WHERE id = #{id}
    </select>
</mapper>
XMLファイルの配置場所は、resources配下にRepositoryクラスと同じパスの構成で配置します。
User.java:Entityクラス
データベースから取得したデータを格納するEntityクラスは下記の通り。
[com.example.demo.entity.User.java]
package com.example.demo.entity;

import java.util.Date;

import lombok.Data;

/**
 * ユーザー情報 Entity
 */
@Data
public class User {

    /**
     * ID
     */
    private Long id;

    /**
     * 名前
     */
    private String name;

    /**
     * 住所
     */
    private String address;

    /**
     * 電話番号
     */
    private String phone;

    /**
     * 更新日時
     */
    private Date updateDate;

    /**
     * 登録日時
     */
    private Date createDate;

    /**
     * 削除日時
     */
    private Date deleteDate;
}
UserSearchRequest.java:Beanクラス
画面からのリクエストデータを格納するBeanクラスは下記の通り。
package com.example.demo.dto;

import java.io.Serializable;

import lombok.Data;

/**
 * ユーザー情報 検索用リクエストデータ
 */
@Data
public class UserSearchRequest implements Serializable {

  /**
   * ユーザーID
   */
  private Long id;
}
スポンサーリンク
フロントエンド(画面側)のソースコード
search.html:検索画面
検索画面のHTMLは下記の通り。
[templates/user/search.html]
<!DOCTYPE html>
<html xmlns="http://www.w3.org/1999/xhtml"
    xmlns:th="http://www.thymeleaf.org">
<head>
<title>ユーザー情報検索</title>
<link href="/css/list.css" rel="stylesheet"></link>
<meta charset="utf-8" />
</head>
<body>
    <h1>ユーザー情報検索</h1>
    <form th:action="@{/user/id_search}" th:object="${userSearchRequest}"
        th:method="post">
        <div>
            ID:<input type="text" th:field="*{id}" size="40" />
        </div>
        <br />
        <div>
            <input type="submit" value="検索" style="width: 100px;" />
        </div>
        <br />
    </form>
    <div th:if="${userinfo}">
        <table th:object="${userinfo}">
            <tr>
                <th class="cell_title">名前</th>
                <td th:text="*{name}"></td>
            </tr>
            <tr>
                <th class="cell_title">住所</th>
                <td th:text="*{address}"></td>
            </tr>
            <tr>
                <th class="cell_title">電話番号</th>
                <td th:text="*{phone}"></td>
            </tr>
        </table>
    </div>
</body>
</html>
list.css:スタイルシート
[static/css/list.css]
body {
  width: 90%;
}
table{
    width: 100%;
    border-collapse: collapse;
  font-size: 12px;
}

table th, table td {
    border: 1px solid #ddd;
    padding: 6px;
}

table th {
  background-color: #F2F2F2;
}
.center {
  text-align: center;
}
動作確認:Webアプリケーションの実行
Spring Bootプロジェクトを起動して http://localhost:8080/user/search へアクセスします。
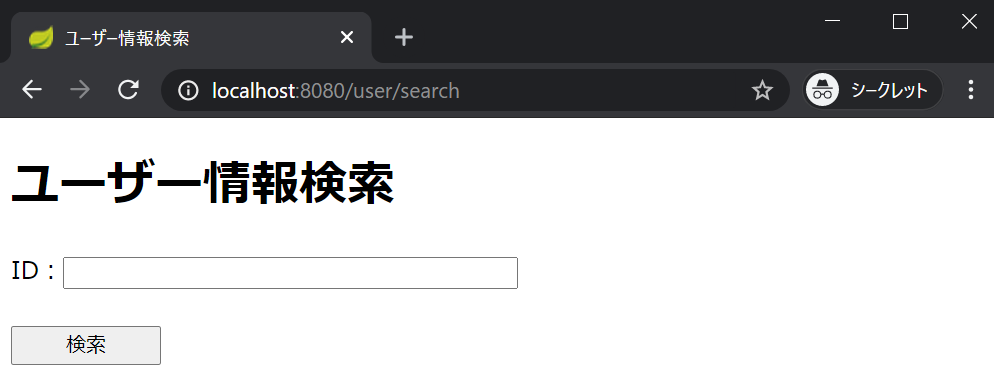
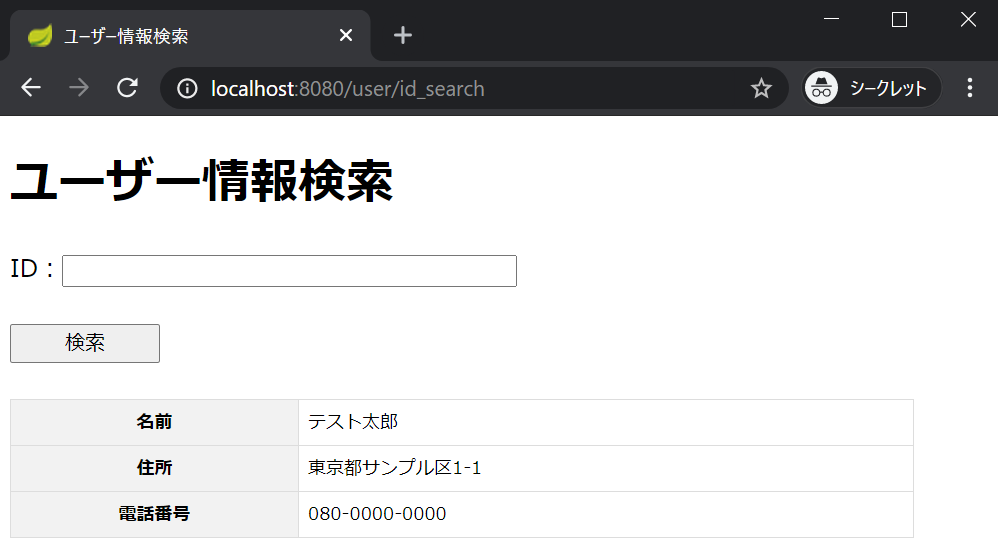
ユーザー情報検索画面が表示されるので、事前準備で登録したID「1」を入力して検索ボタンを押下すると、ユーザー情報が表示されます。
終わりに
本記事では「Spring Boot + MyBatisでデータベースに接続する方法」について紹介しました。
- 準備編 EclipseでSpring Bootの環境構築 | 分かりやすく図解で説明
- 第一章 Spring Boot+Thymeleafで”Hello World”を作成する
- 第二章 Spring Boot+JPAでデータベースに接続する方法
- 第三章 Spring Boot+MyBatisでデータベースに接続する
- 実戦編 MyBatis + SpringでWebアプリ(CRUD)を作成する