

はじめに
前回の記事では「Spring Boot」と「Thymeleaf」を使用した一覧画面の作成方法について紹介しました。
本記事では一覧画面の「詳細」ボタンを押下して、対象データを詳細画面に表示させる方法について紹介します。
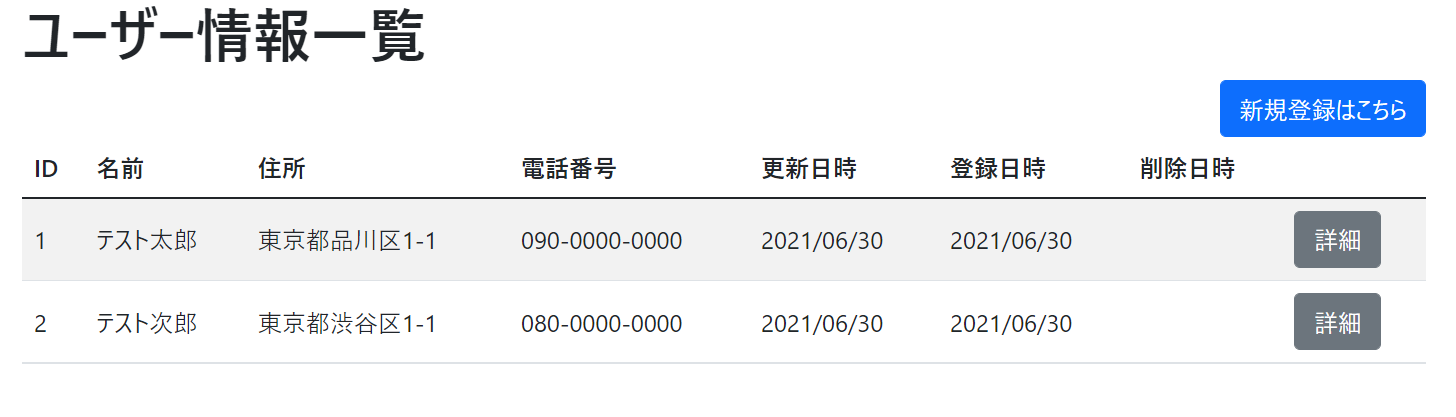
[前回の記事で作成した一覧画面]
[本記事で作成する詳細画面]

テーブル定義
今回の例で使用するテーブル定義は次のとおり。
[テーブル定義]
| 物理名 | 論理名 | データ型 | NOT NULL | 説明 |
| id | ID | BIGINT | 〇 | 主キー(AUTO_INCREMENT) |
| name | 名前 | VARCHAR(100) | 〇 | ユーザーの名前 |
| address | 住所 | VARCHAR(255) | ユーザーの住所 | |
| phone | 電話番号 | VARCHAR(50) | ユーザーの電話番号 | |
| update_date | 更新日時 | DATETIME | 〇 | 最終更新日時 |
| create_date | 作成日時 | DATETIME | 〇 | 登録日時 |
| delete_date | 削除日時 | DATETIME | 論理削除した日時 |
開発環境
開発環境は以下のとおり。
| 開発環境 | 名称 | 説明 |
| 開発言語 | Java | 人気の開発言語 |
| 開発ツール | Eclipse | Javaでの定番開発ツール |
| フレームワーク | Spring Boot | 人気のSpringフレームワークをベースとしたフレームワーク |
| テンプレートエンジン | Thymeleaf | Spring Bootと相性が良いテンプレートエンジン |
| データベース | MySQL | フリーで利用できる人気データベース |
その他 データベースへの接続は「Spring Data JPA」、画面のデザインには「Bootstrap」を使用しています。
スポンサーリンク
ディレクトリ構成
ディレクトリ構成は次のとおり。
springSample
  |
  |___src.main.java
       |
       |___com.example.demo
       |    |
       |    |___controller
       |    |    |
       |    |    |__UserController.java
       |    |
       |    |___entity
       |    |    |
       |    |    |___User.java
       |    |
       |    |___repository
       |    |    |
       |    |    |___UserRepository.java
       |    |
       |    |___service
       |         |
       |         |___UserService.java
       |
       |___src.main.resources
            |
            |___templates
            |    |
            |    |___common
            |    |    |
            |    |    |___head.html
            |    |
            |    |___user
            |         |
            |         |___add.html
            |         |
            |         |___list.html
            |         |
            |         |___view.html
            |
            |___application.properties
バックエンド(サーバー)側のソースコード
コントローラークラス(UserController.java)
コントローラクラスの内容は以下のとおり。
package com.example.demo.controller;

import java.util.List;

import org.springframework.beans.factory.annotation.Autowired;
import org.springframework.stereotype.Controller;
import org.springframework.ui.Model;
import org.springframework.web.bind.annotation.GetMapping;
import org.springframework.web.bind.annotation.PathVariable;

import com.example.demo.entity.User;
import com.example.demo.service.UserService;

/**
 * ユーザー情報 Controller
 */
@Controller
public class UserController {

  /**
   * ユーザー情報 Service
   */
  @Autowired
  private UserService userService;

  /**
   * ユーザー情報一覧画面を表示
   * @param model Model
   * @return ユーザー情報一覧画面
   */
  @GetMapping(value = "/user/list")
  public String displayList(Model model) {
    List<User> userlist = userService.searchAll();
    model.addAttribute("userlist", userlist);
    return "user/list";
  }

  /**
   * ユーザー新規登録画面を表示
   * @param model Model
   * @return ユーザー情報一覧画面
   */
  @GetMapping(value = "/user/add")
  public String displayAdd(Model model) {
    return "user/add";
  }

  /**
   * ユーザー情報詳細画面を表示
   * @param id 表示するユーザーID
   * @param model Model
   * @return ユーザー情報詳細画面
   */
  @GetMapping("/user/{id}")
  public String displayView(@PathVariable Long id, Model model) {
    User user = userService.findById(id);
    model.addAttribute("userData", user);
    return "user/view";
  }
}
コントロールクラスに用意しているメソッドは以下です。
| メソッド | 説明 |
| displayList | HTTP GETで「http://localhost:8080/user/list」にアクセスしたときに動き出すメソッド。「ユーザー情報一覧」画面の初期表示をおこなう。 |
| displayAdd | 「ユーザー情報一覧」画面の「新規登録はこちら」ボタン押下時に動き出すメソッド。「ユーザー新規登録」ダミー画面の初期表示をおこなう。 |
| displayView | 「ユーザー情報一覧」画面の「詳細」ボタン押下時に動き出すメソッド。「ユーザー情報詳細」画面の初期表示をおこなう。 |
サービスクラス(UserService.java)
サービスクラスの内容は以下のとおり。
package com.example.demo.service;

import java.util.List;

import org.springframework.beans.factory.annotation.Autowired;
import org.springframework.stereotype.Service;

import com.example.demo.entity.User;
import com.example.demo.repository.UserRepository;

/**
 * ユーザー情報 Service
 */
@Service
public class UserService {
  /**
   * ユーザー情報 Repository
   */
  @Autowired
  private UserRepository userRepository;

  /**
   * ユーザー情報 全検索
   * @return 検索結果
   */
  public List<User> searchAll() {
    return userRepository.findAll();
  }

  /**
   * ユーザー情報 主キー検索
   * @return 検索結果
   */
  public User findById(Long id) {
    return userRepository.findById(id).get();
  }
}
サービスクラスに用意しているメソッドは以下です。
| メソッド | 説明 |
| searchAll | 検索条件なしでデータベースからユーザー情報を全件取得する |
| findById | 主キー指定でデータベースからユーザー情報を1件取得する |
エンティティクラス(User.java)
データベースから取得したデータを格納するエンティティクラスの内容は以下のとおり。
@Dataアノテーションを使用して、getter、setterの定義を省略しています。
package com.example.demo.entity;

import java.io.Serializable;
import java.util.Date;

import javax.persistence.Column;
import javax.persistence.Entity;
import javax.persistence.GeneratedValue;
import javax.persistence.GenerationType;
import javax.persistence.Id;
import javax.persistence.Table;

import lombok.Data;

/**
 * ユーザー情報 Entity
 */
@Entity
@Data
@Table(name = "user")
public class User implements Serializable {
  /**
   * ID
   */
  @Id
  @Column(name = "id")
  @GeneratedValue(strategy = GenerationType.IDENTITY)
  private Long id;
  /**
   * 名前
   */
  @Column(name = "name")
  private String name;
  /**
   * 住所
   */
  @Column(name = "address")
  private String address;
  /**
   * 電話番号
   */
  @Column(name = "phone")
  private String phone;
  /**
   * 更新日時
   */
  @Column(name = "update_date")
  private Date updateDate;
  /**
   * 登録日時
   */
  @Column(name = "create_date")
  private Date createDate;
  /**
   * 削除日時
   */
  @Column(name = "delete_date")
  private Date deleteDate;
}
スポンサーリンク
リポジトリクラス(UserRepository.java)
データベースにアクセスする為のリポジトリクラスの内容は以下のとおり。
package com.example.demo.repository;

import org.springframework.data.jpa.repository.JpaRepository;
import org.springframework.stereotype.Repository;

import com.example.demo.entity.User;

/**
 * ユーザー情報 Repository
 */
@Repository
public interface UserRepository extends JpaRepository<User, Long> {}
フロントエンド(クライアント)側のソースコード
ユーザー情報詳細画面(view.html)
共通ヘッダ(head.html)、ユーザー情報一覧画面(list.html)のHTMLは一覧画面作成の記事で紹介していますので、そちらの記事をご覧ください。
一覧画面作成の記事はこちら
ユーザー情報詳細のHTMLは以下のとおり。
<!DOCTYPE html>
<html xmlns="http://www.w3.org/1999/xhtml"
  xmlns:th="http://www.thymeleaf.org">
<head
  th:replace="common/head :: head_fragment(title = 'ユーザー情報詳細', scripts = ~{::script}, links = ~{::link})"></head>
<body>
  <div class="container">
    <h1>ユーザー情報詳細</h1>
    <div th:object="${userData}">
      <div class="row mx-md-n5">
        <div class="col-2 pt-3 border bg-light">名前</div>
        <div class="col pt-3 border">
          <p th:text="*{name}"></p>
        </div>
      </div>
      <div class="row mx-md-n5">
        <div class="col-2 pt-3 border bg-light">住所</div>
        <div class="col pt-3 border">
          <p th:text="*{address}"></p>
        </div>
      </div>
      <div class="row mx-md-n5">
        <div class="col-2 pt-3 border bg-light">電話番号</div>
        <div class="col pt-3 border">
          <p th:text="*{phone}"></p>
        </div>
      </div>
    </div>
    <br />
    <div class="text-center">
      <a th:href="@{/user/{id}/edit(id=*{id})}" class="btn btn-primary disabled" aria-disabled="true"> 編集 </a>
      <a th:href="@{/user/{id}/delete(id=*{id})}" class="btn btn-secondary disabled" aria-disabled="true"> 削除 </a>
      <a href="/user/list" class="btn btn-secondary">一覧に戻る</a>
    </div>
  </div>
</body>
</html>
今回の記事では利用しないため、編集ボタンと削除ボタンは非活性にしています。もし、編集ボタンと削除ボタンを活性化する場合は次のようにします。
<a th:href="@{/user/{id}/edit(id=*{id})}" class="btn btn-primary"> 編集 </a>
<a th:href="@{/user/{id}/delete(id=*{id})}" class="btn btn-secondary"> 削除 </a>
動作確認
Spring Bootプロジェクトを実行して http://localhost:8080/user/list へアクセスします。
ユーザー情報一覧画面が表示されるので、一覧から対象ユーザーの「詳細」ボタンを押下します。ユーザー詳細画面が表示されればOKです。
画面内のイベントは以下のとおり。
「編集」ボタン押下 → Spring Boot + Thymeleafで編集画面を作成する
「削除」ボタン押下 → 対象データを削除して一覧画面へ戻る
「一覧に戻る」ボタン押下 → Spring Boot + Thymeleafで一覧画面を作成する